French Bread Rolls
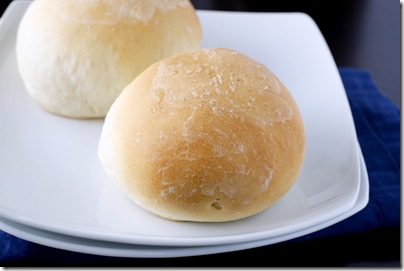
If you’re looking for a dinner roll recipe that is soft, fluffy, and easy to make, look no further. I have made these rolls more times than I can count, and they turn out perfect every time. We’ve had them with soup, as burger buns, as slider buns, and as dinner rolls. I’ve made other rolls, but these are by far my favorite, and consistently turn out the best. They freeze wonderfully, and I always plan to freeze some after they’re completely cool so we can enjoy them with a future meal. Unfortunately, they taste absolutely amazing warm out of the oven, and we never end up with too many to freeze.
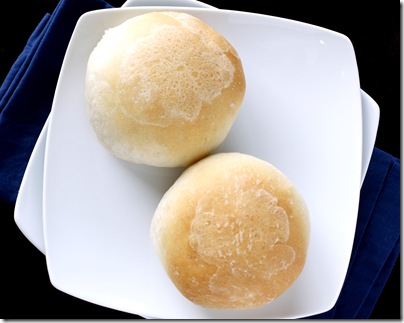
We love these rolls, and if you like soft and fluffy homemade bread, I’m pretty sure you’ll love them too. As an added benefit, your house will smell incredible as you’re baking them!
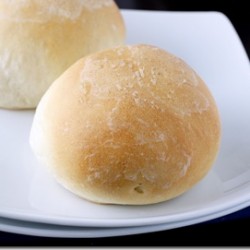
French Bread Rolls
Ingredients:
- 1 1/2 cups warm water
- 3/4 Tbsp instant yeast (or 1 Tbsp active dry yeast)
- 2 Tbsp granulated sugar
- 2 Tbsp canola oil
- 1 teaspoon salt
- 4 cups all-purpose flour, give or take a few tablespoons
Directions:
- In the bowl of a stand mixer or in a large bowl, combine the yeast, warm water and sugar and let sit for 5 minutes, or until is foamy and bubbly. Add the oil, salt and 2 cups of flour. (If using instant yeast, you can skip the proofing step and just combine the yeast with the rest of the ingredients). Begin mixing and continue to add the rest of the flour gradually until the dough has pulled away from the sides of the bowl. The dough should be soft and smooth but still slightly tacky to the touch. Be careful to add only as much flour as you need.
- Knead the dough in the stand mixer or by hand until it is very smooth and elastic, about 5 minutes in a stand mixer or 8-10 minutes by hand. Lightly spray a large bowl with cooking spray and place the dough in the bowl. Cover the bowl with lightly greased plastic wrap and let the dough rise until it has doubled, about 1 hour.
- Lightly punch down the dough and turn it out onto a lightly greased countertop. Divide the dough into 12 equal pieces and form the dough into round balls. Place the rolls on a lightly greased or silicone-lined baking sheet about an inch or two apart. Cover the rolls gently with lightly greased plastic wrap. Let the plastic wrap gently hang over the sides of the pan to fully cover the rolls but not press them down. Let the rolls rise until doubled, about 45 minutes.
- Preheat the oven to 400 degrees. Bake for 12-14 minutes until lightly browned and cooked through.
from Mel’s Kitchen Cafe

 Welcome! I'm Megan and it's my hope that here you'll find food that has been made with love and recipes that are shared with joy. Thanks for stopping by!




Those definitely look like the best rolls I've ever seen. What a winner of a recipe!
Great job- these look so perfect and delicious!
I love the smell of bread baking in the oven 🙂 Your dinner rolls look fantastic!
yum! they do look perfect!
Wow–these look straight out of a bakery! But homemade usually tastes so much better 🙂 Sounds like with these, yours do!
These look awesome! I'm a sucker for almost any dinner roll.
Your rolls look so perfect! I really need to try some bread baking stat!
Um yeah, these sound and look so delicious! Goodness knows there is plenty of bread flowing through here.
These are just perfect! They look so fluffy, and sound pretty simple, too. Win!
These look so perfect and fluffy and crusty. Just what good dinner rolls should be!
I cannot for the life of me make a nice, fluffy dinner roll. I am definitely going to try your recipe!!
I use this recipe too. It is by far the best roll recipe I have made. I really love that they freeze well so I try to make a double batch if I have time.
They are perfect!
These rolls look so plump and delicious! Would love to smear some butter on these guys. Yum!
Wow these rolls look absolutely perfect! I love how light and fluffy they look. I wish I had some of these right now. I'll have to try this recipe out, I love making bread. 🙂
I totally agree that these look perfect. Although I'm a fiend when it comes to baking whole grain everyday bread every week, I absolutely crave dinner rolls that are white and light as a feather. Must make these…pronto!
these look great, Megan! Perfect for a bowl of soup 🙂
These look awesome! I'm going to try them soon! I'm always up for a new bread recipe!
Just what I have been searching for. I am going to try them today. I like that there is nothing overnight. Thanks Megan.
You made my day! Wish I would have found this earlier today – they would have been a great addition to our dinner. 🙂
Oh boy, do I love bread, especially yeast based! I also love your “bacon and eggs”! CUTE!
Looks wonderful, Megan! I'll definitely make them these days!! Can't wait!! Thanks so much for the recipe! 😉 Cheers! sheila
I made them yesterday and they turned out great! 🙂
Sheila – So glad you liked these! Thanks for letting me know 🙂
I am making these today! Can't wait 🙂
Forgive me, but I am new to bread making. When you say to skip the proofing step if using dry active yeast, do I still need to add the warm water, or is that just to proof the yeast? Thanks!
Jake and Jenzi – It actually says you can skip the proofing step if using instant yeast. And yes, you still need the warm water, but just combine everything together in one bowl – no need to combine the yeast and water and sugar separately. Good luck! 🙂
Hi Megan my daughter and I are going to make these tomorrow, My husband has been wanting home made rolls for yrs and mine always flop so i am glad to find a recipie that works so well!! let u knowhow it works out thanks for the great recipies!!!
can i freeze the dough and cook them later had to make rolls for 100 people
Yes, I would freeze the rolls once you form them, then thaw them in the refrigerator and set them on the counter for the second rise. Good luck! 🙂
What does it mean by “a lightly greased cooking sheet or lightly greased plastic wrap?” Do you mean with cooking spray used for a large bowl? What kind of cooking spray should I buy? Sorry this is my first time to bake.
Just spray a cookie sheet lightly with cooking spray before placing the rolls on it. That will keep them from sticking. You could also use a silicone baking sheet. Same for the plastic wrap – spray it lightly with cooking spray so that it doesn’t stick to the top of the rolls while they’re rising. I generall buy Pam cooking spray, or the store brand equivalent. Good luck! Let me know if you have any more questions. 🙂
This is a great recipe.. Thanx for sharing. I just made these rolls this morning, my firsrt time ever to bake bread and im telling u, i was so surprised to know how easy to make them and so pleased with the result. My whole family loved them!!
I’m so glad you liked them! 🙂
I am making these to serve tomorrow. If I freeze them then how long and at what temp do I heat before serving? If I don’t freeze how should I heat them up before serving.
Thanks, these sound great and look good too.
Hi Debra, hope I’m not too late! If you froze the buns after baking, just defrost them and then I would just warm them in the microwave for 1 minute or so – just until they are warmed up. If you want to use the oven, try 300 for 5-10 minutes. I’m guessing the outside will get a little crispy though.
Hate to be the spoiler these rolls look great but are actually tasteless like eating a floured rice cake have to put it on my Yuck Yuck list – Sorry Megan 1st item you’ve posted that I didn’t enjoy!
I agree the rolls are not especially flavorful, but they are an amazing base from which to work. I’ve trying making bread before and this is the FIRST time my rolls have not come out brick hard. The next time I make these rolls, I may try to add a hint of flavor by dusting them with garlicky olive oil and rosemary. Still, as a basic roll to eat with jam, soup, salad or even tuna fish, I am very, very happy with this recipe. Thanks Megan! 🙂
I just made these with half bread flour and half white whole wheat flours. They turned out fabulous! Thanks.
Pingback: dad likes food | Menu for the Week of Oct. 27
Easy and quick to make, with a nice crumb. Not really ‘French bread’ at all, though – very soft, more like a dinner roll. They were quite bland, even though I used olive oil rather than canola, and they needed more salt.
Not going to lie, I have been making these for a few years, I try others but just come back to this. Love them.